Как настроить Google Analytics
Google Analytics используется для просмотра и понимания веб-трафика.
Он бесплатный и простой в использовании.
Вы можете настроить его для многих случаев использования.
Он работает из коробки.
Это быстро настроить. Получите ваши идеи сегодня!
Создайте мой бесплатный сайт ❯Пропустите чтение о Google Analytics. Подведите меня прямо к первому шагу. Перейти к первому шагу
Что такое Google Аналитика
Google Analytics — это решение для веб-аналитики.
Он разработан и поддерживается Google.
Самая новая версия называется Google Analytics 4.
Его можно использовать для просмотра таких данных, как аудитория, просмотры страниц, сеансы, демография и события.
Зачем включать Google Analytics
Понимайте свой веб-трафик, чтобы принимать лучшие решения.
Понимание и улучшение воронки продаж.
Учитесь на экспериментах (например, с помощью A/B-тестов).
У Google есть еще одно решение под названием Google Optimize. Это решение сделано для тестирования.
Для кого предназначена Google Analytics
Google Analytics полезен для всех, у кого есть веб-сайт.
Он дает вам информацию о том, кто использует ваш сайт и как они взаимодействуют с ним.
Кроме того, интерфейс прост для понимания.
Вам не нужен опыт работы с аналитикой, чтобы пользоваться сервисом и ориентироваться в нем.
Как настроить Google Analytics шаг за шагом
Google Analytics можно настроить двумя способами : глобальный тег веб-сайта (gtag.js) или диспетчер тегов Google .
Самый простой способ — использовать глобальный тег веб-сайта.
В этом руководстве будет использоваться подход The Global Website Tag.
Подготовка
Решите, какой редактор кода использовать, и настройте среду.
W3Schools создала простой в использовании редактор кода под названием W3Schools Spaces . Зарегистрируйтесь и начните в несколько кликов.
Начните бесплатно ❯Создайте файл index.html , чтобы вы были готовы ввести код.
Все настройки. Пойдем!
Настройка Google Analytics: глобальный тег веб-сайта
Шаг 1. Создайте учетную запись Google Analytics.
Перейти к Analytics: Создайте учетную запись или войдите в Analytics
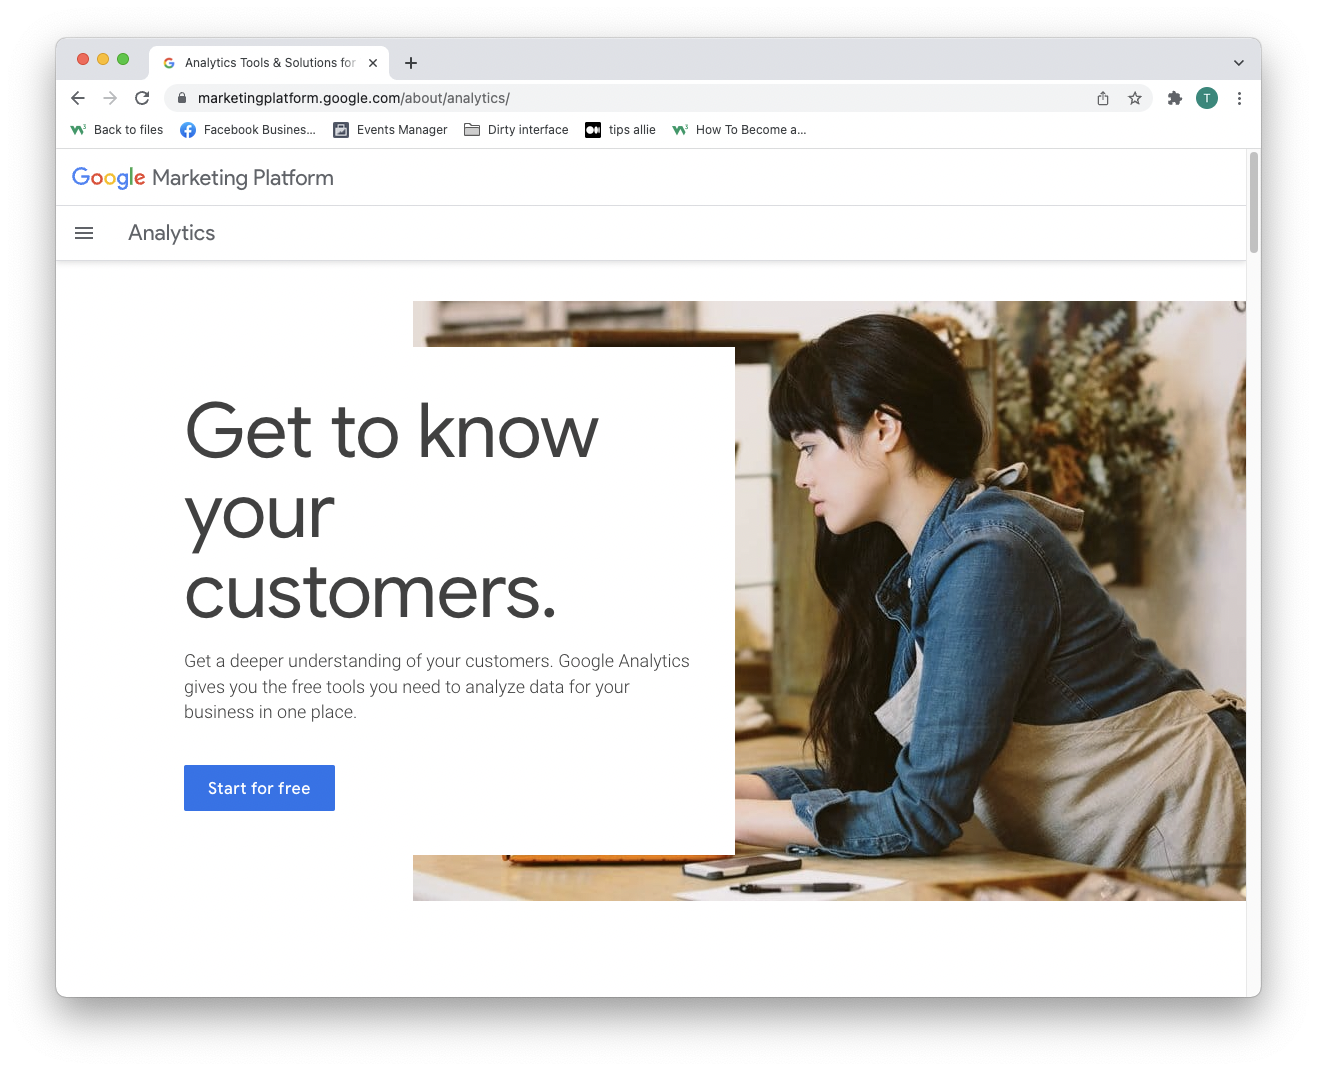
Ссылка в абзаце выше ведет на целевую страницу Google Analytics.
Нажмите кнопку «Начать бесплатно».
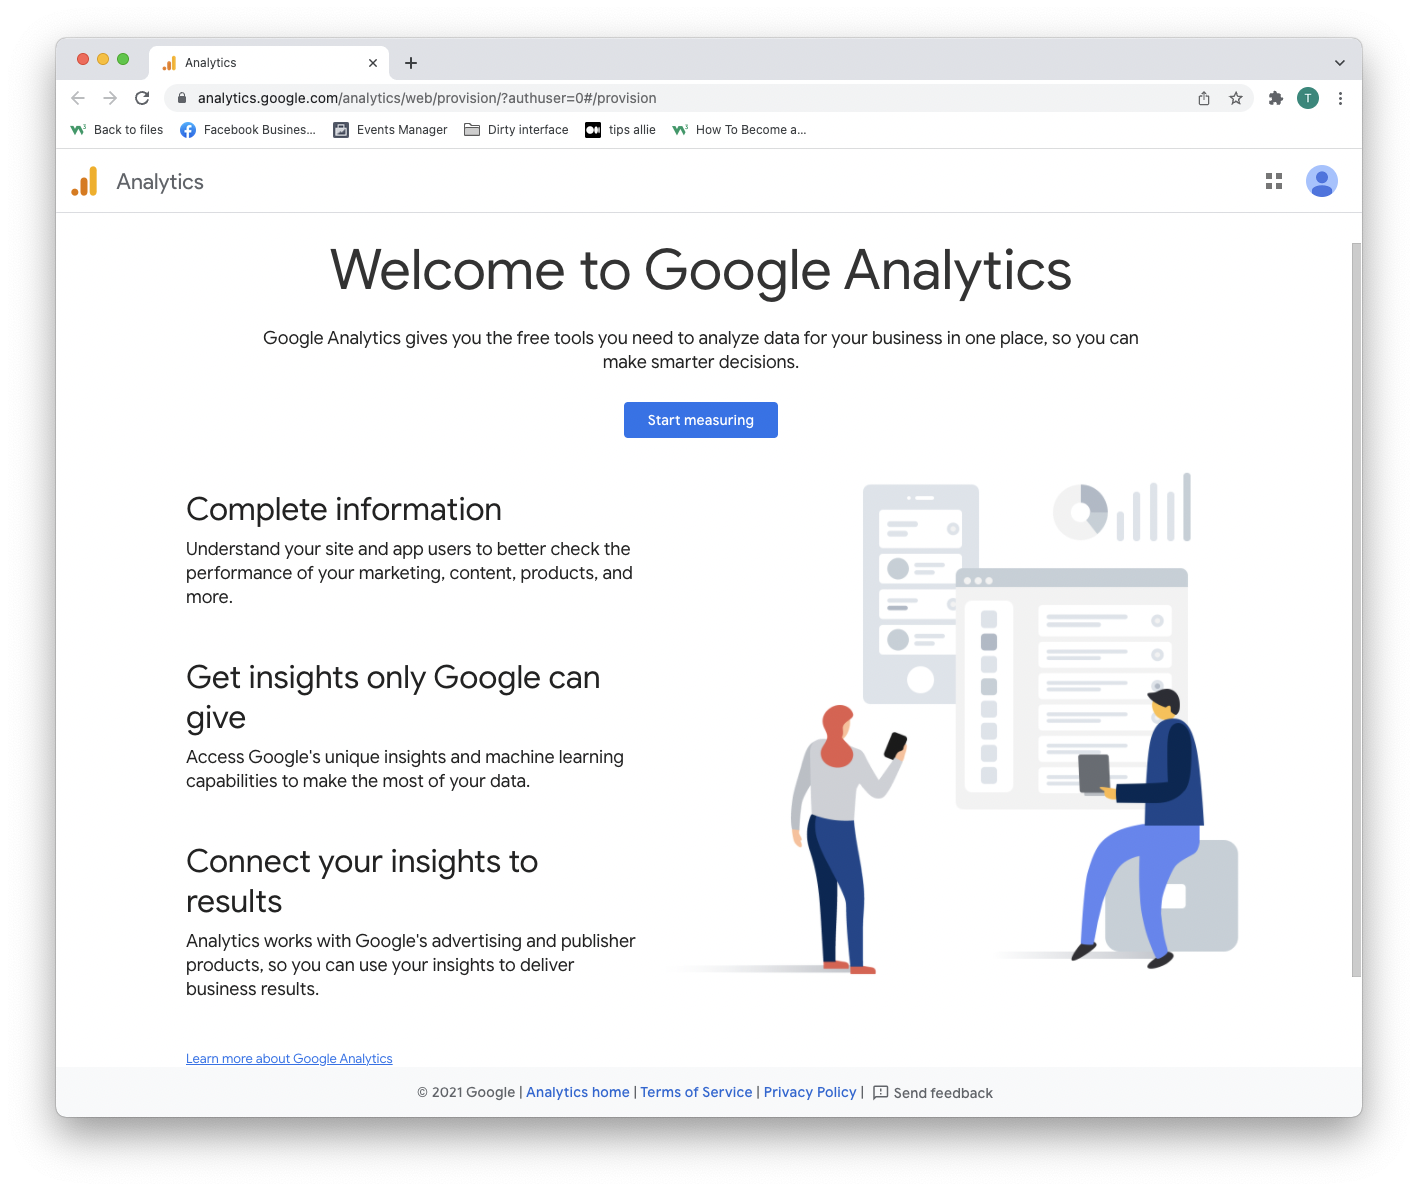
Шаг 2: Войдите на страницу приветствия
После создания учетной записи или входа в систему вас приветствует решение.
Нажмите кнопку «Начать измерение», чтобы продолжить.
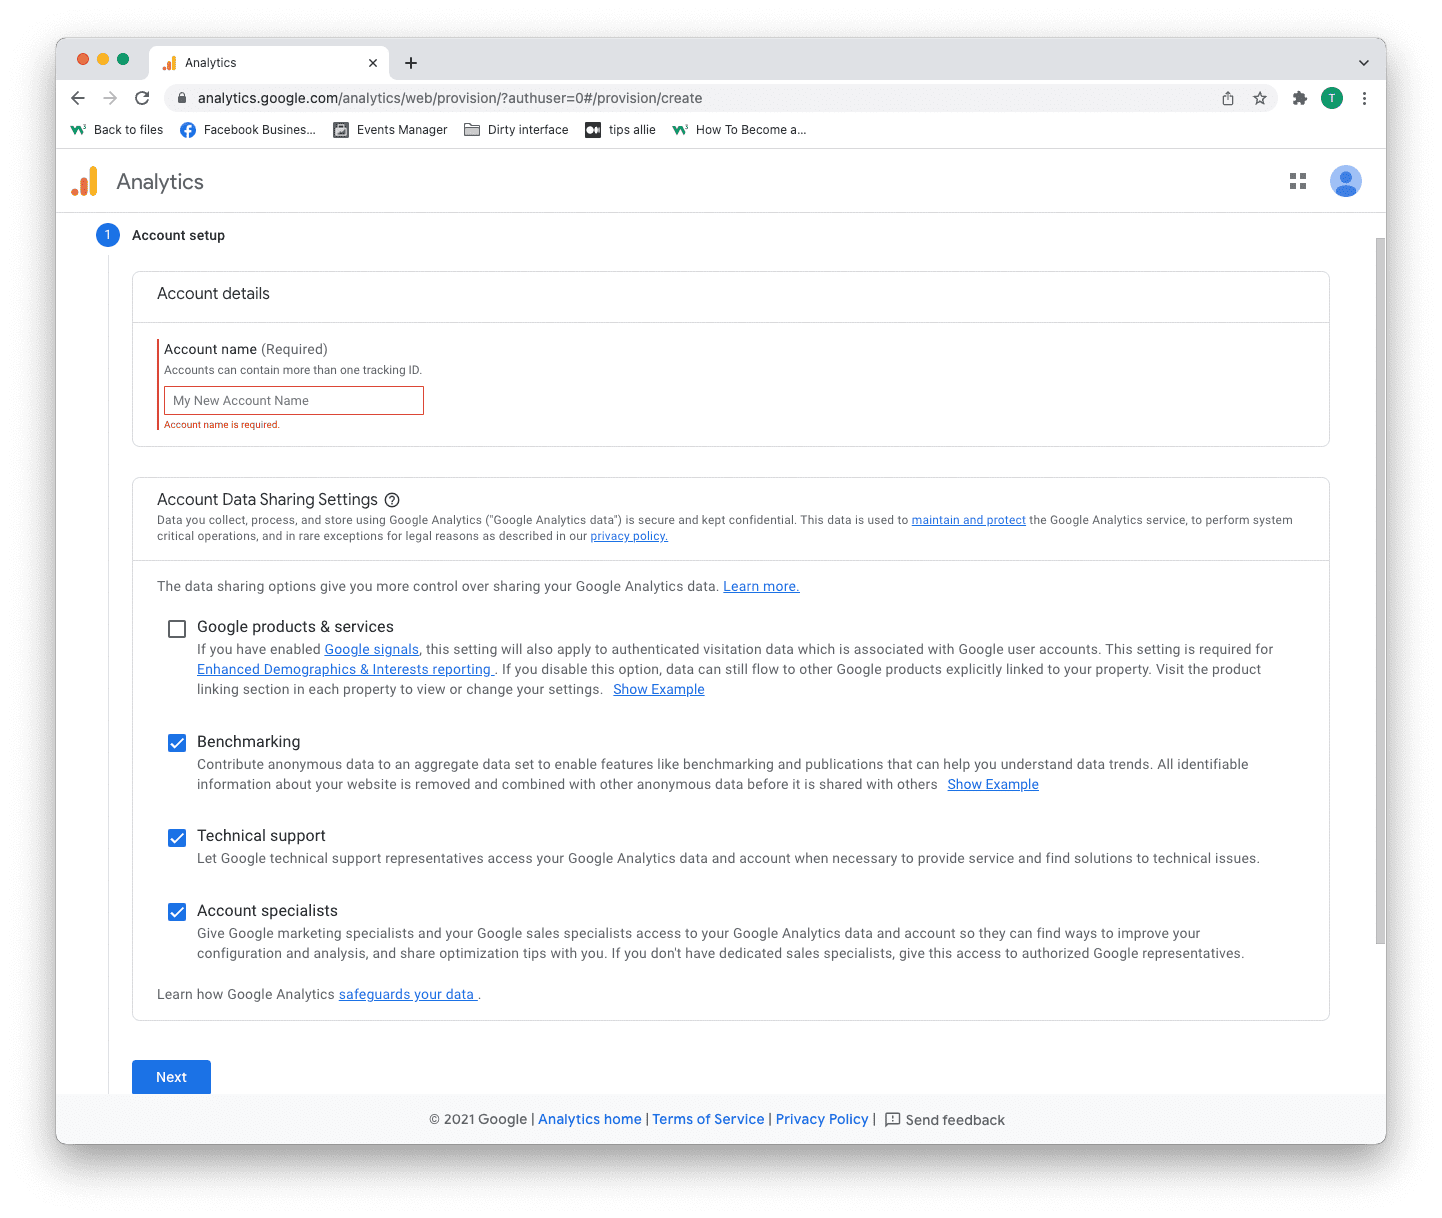
Шаг 3: Настройка учетной записи
У вас есть два решения, чтобы принять здесь.
- Введите имя вашей учетной записи.
- Решите, какими данными вы хотите поделиться.
- Нажмите кнопку «Далее».
Одна учетная запись может иметь более одного идентификатора отслеживания. Вы можете отслеживать более одного веб-сайта с помощью учетной записи.
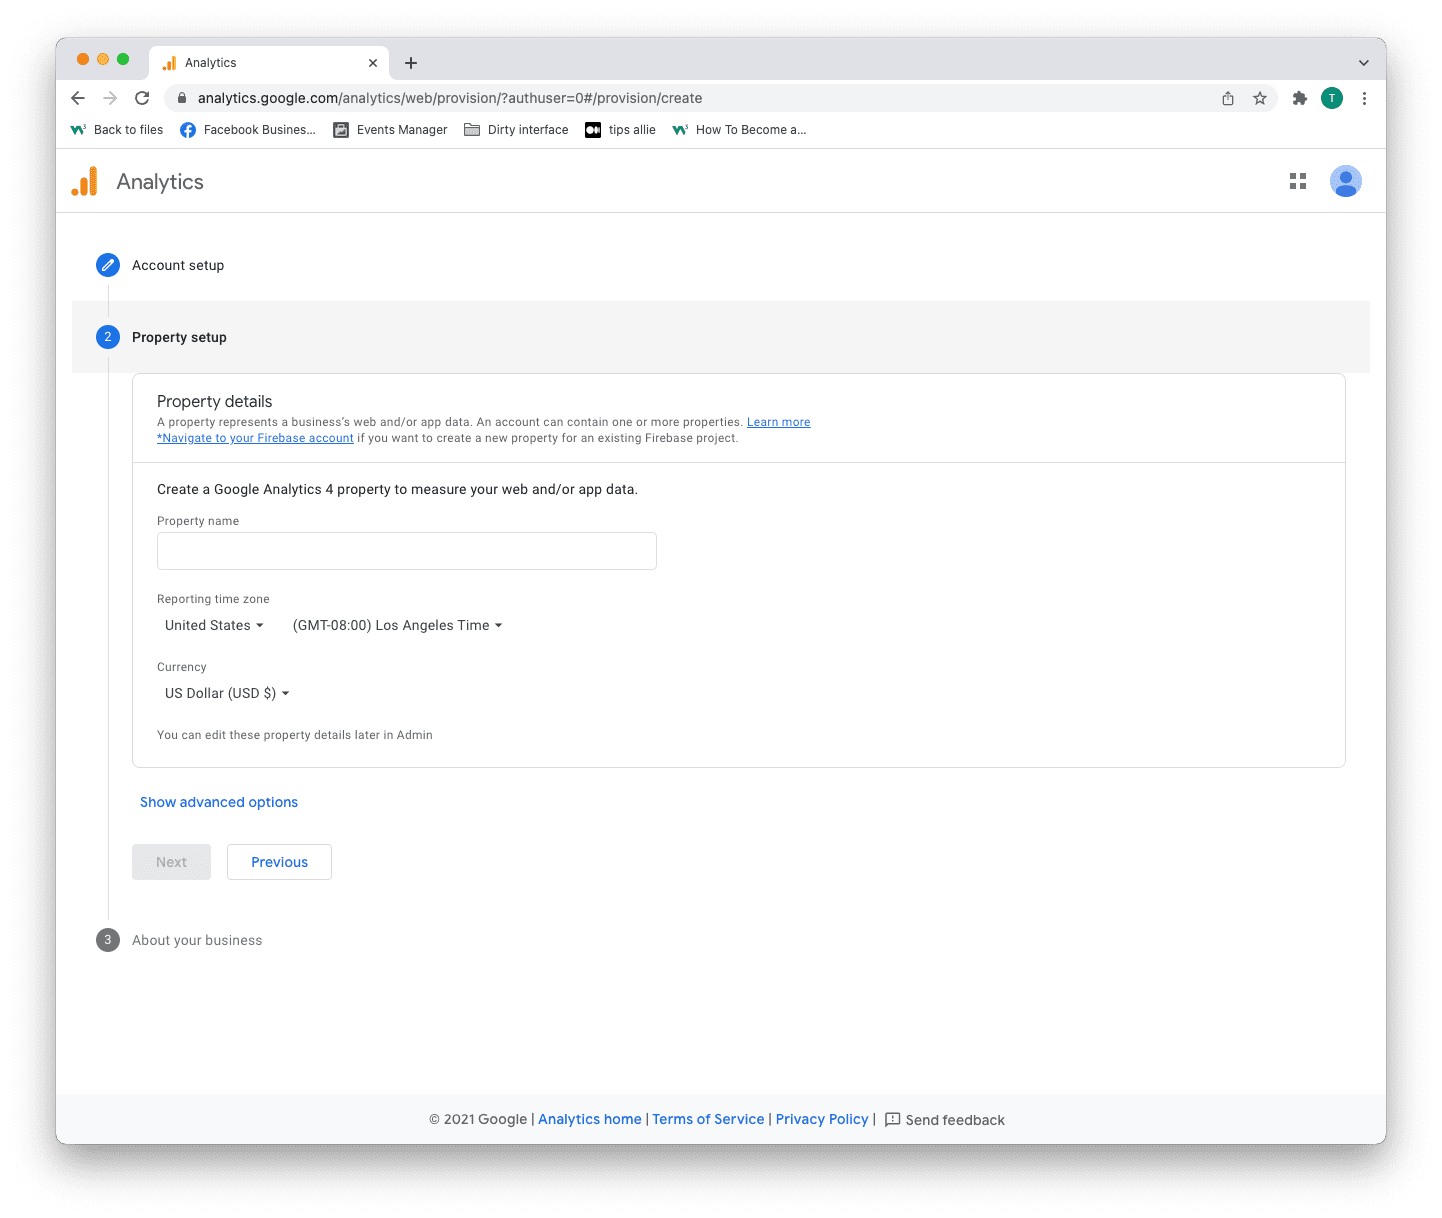
Шаг 4: Настройка свойства
Ресурс — это услуга, которую вы измеряете, например веб-сайт, приложение, дерево ссылок и т. д.
- Введите имя свойства.
- Введите свой часовой пояс.
- Введите валюту, которую вы используете.
- Нажмите кнопку «Далее».
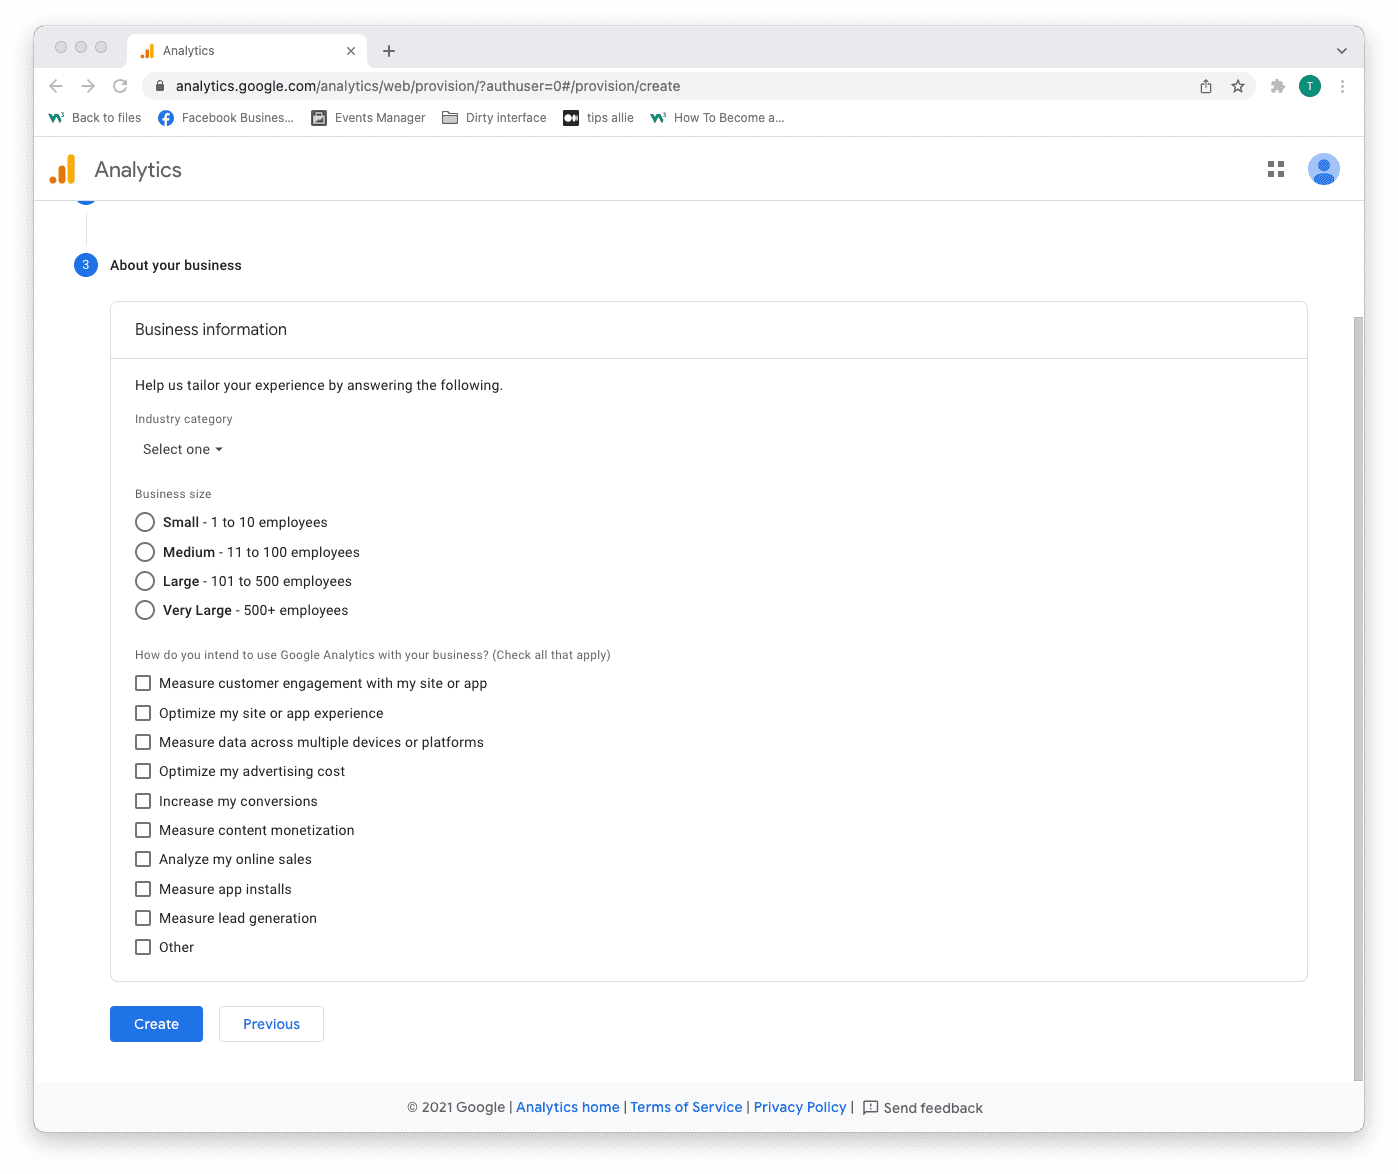
Шаг 5. Добавьте информацию о компании
Аналитика использует информацию, чтобы адаптировать ваш опыт.
- Выберите категорию вашей отрасли.
- Выберите размер бизнеса.
- Tick the boxes for how you are planning to use Analytics.
- Click the "Create" button to proceed.
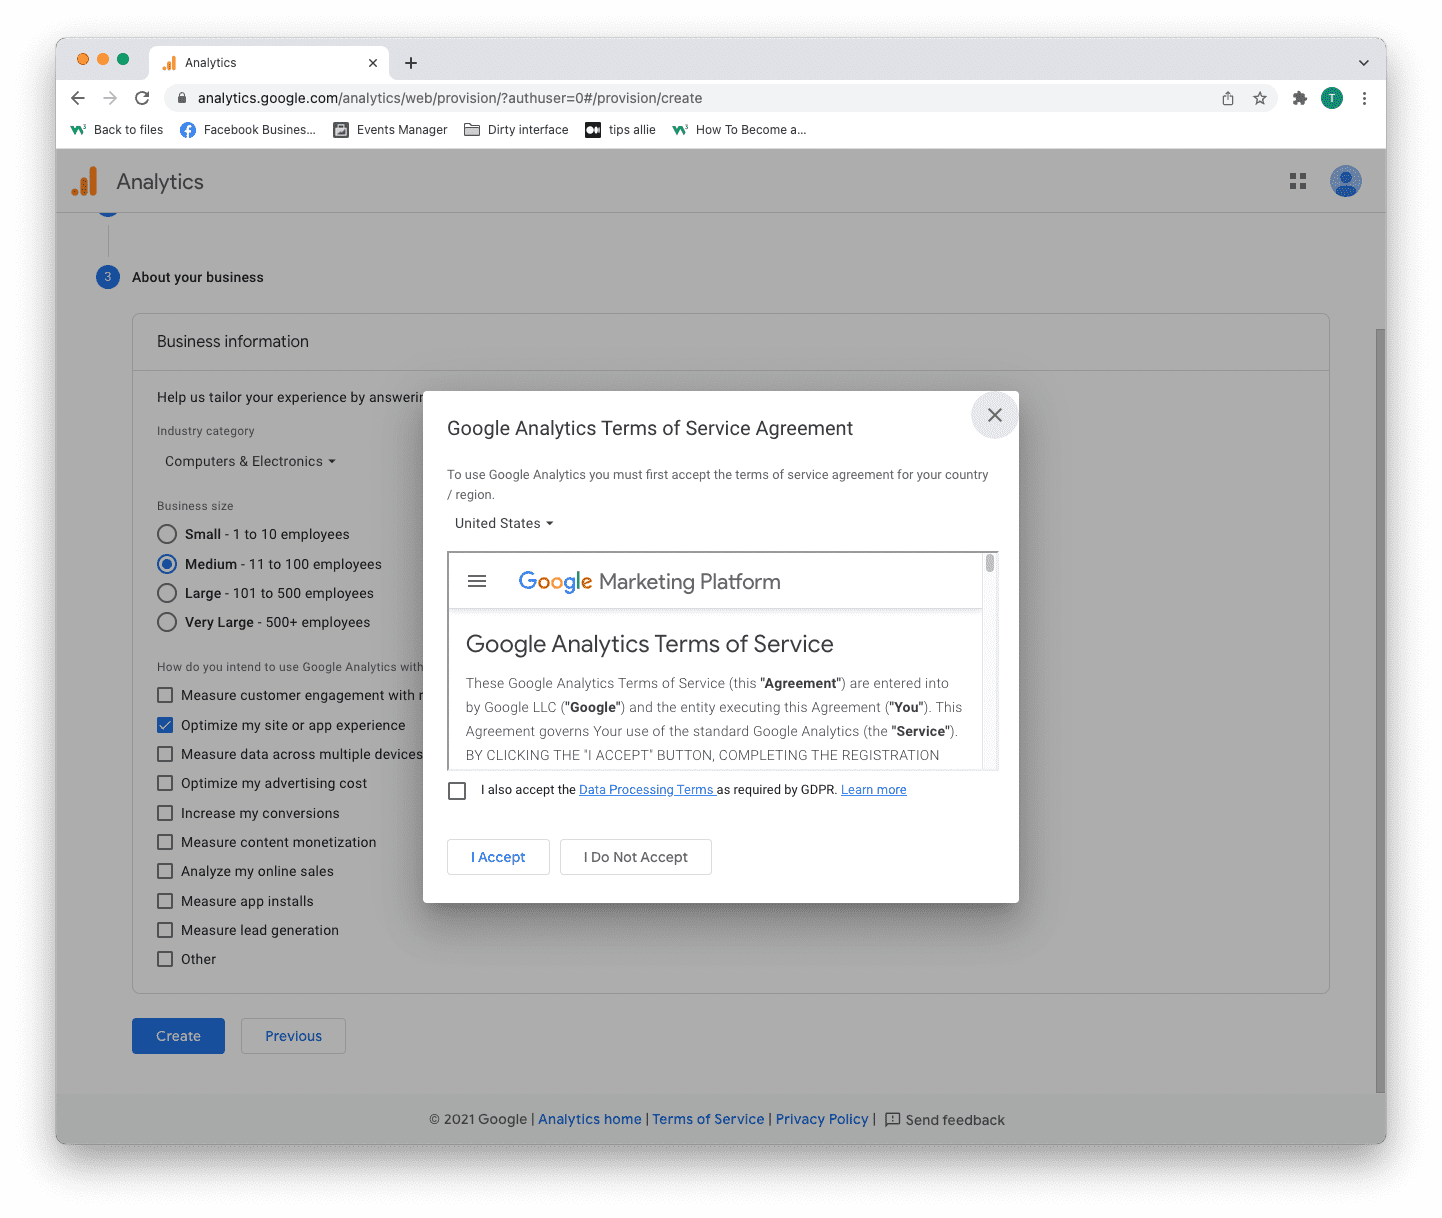
Step 6: Terms of Service Agreement
Read and understand the terms of service.
Tick the GDPR box and click the "I accept" button if you agree.
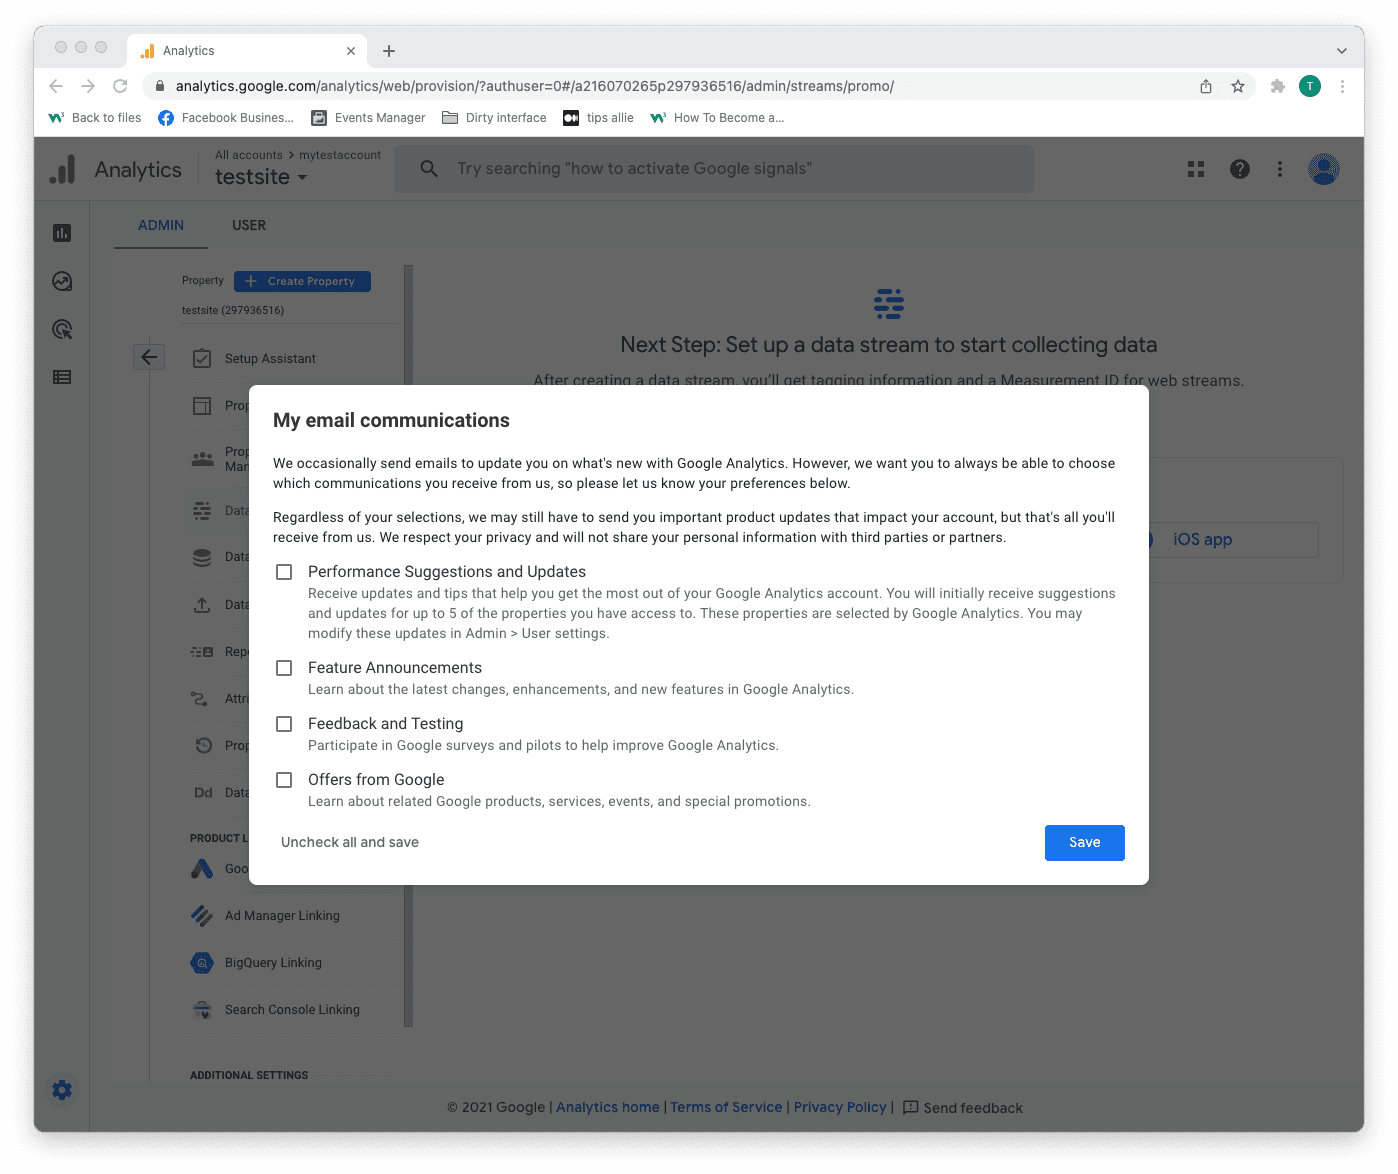
Step 7: Email subscriptions
- Tick or uncheck all boxes.
- Click the "Save" button to continue.
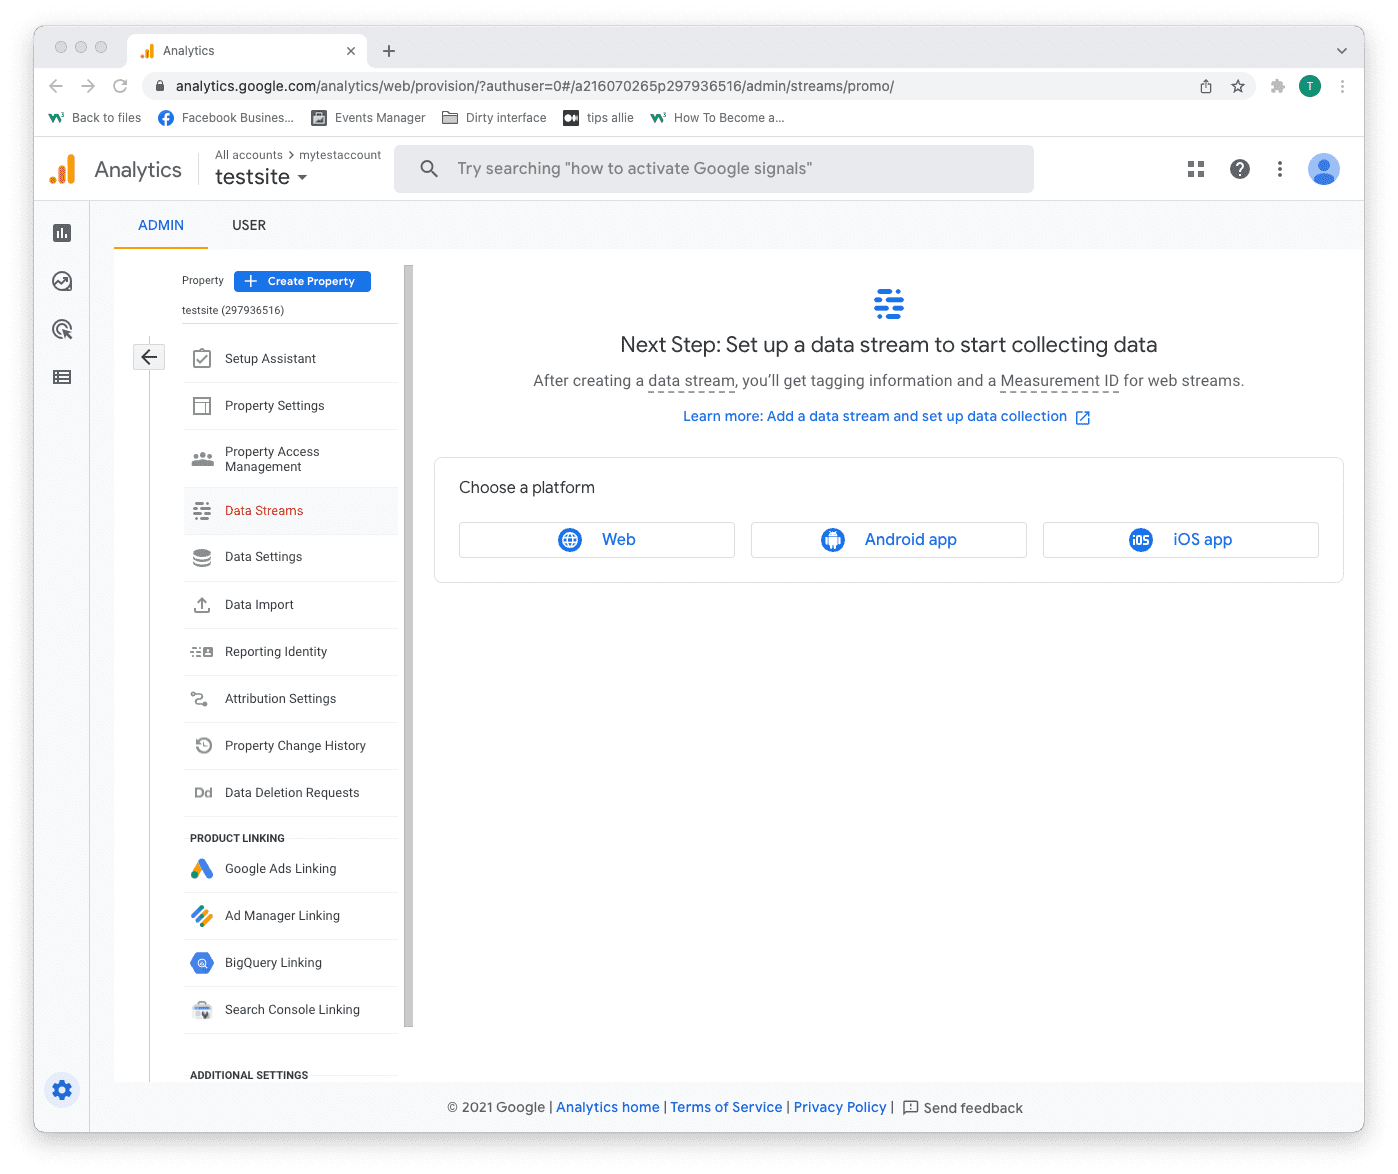
Step 8: Select platform
Chose the platform where you are collecting data.
Then, click the relevant platform to continue.
We are continuing with "Web" as the example in this tutorial.
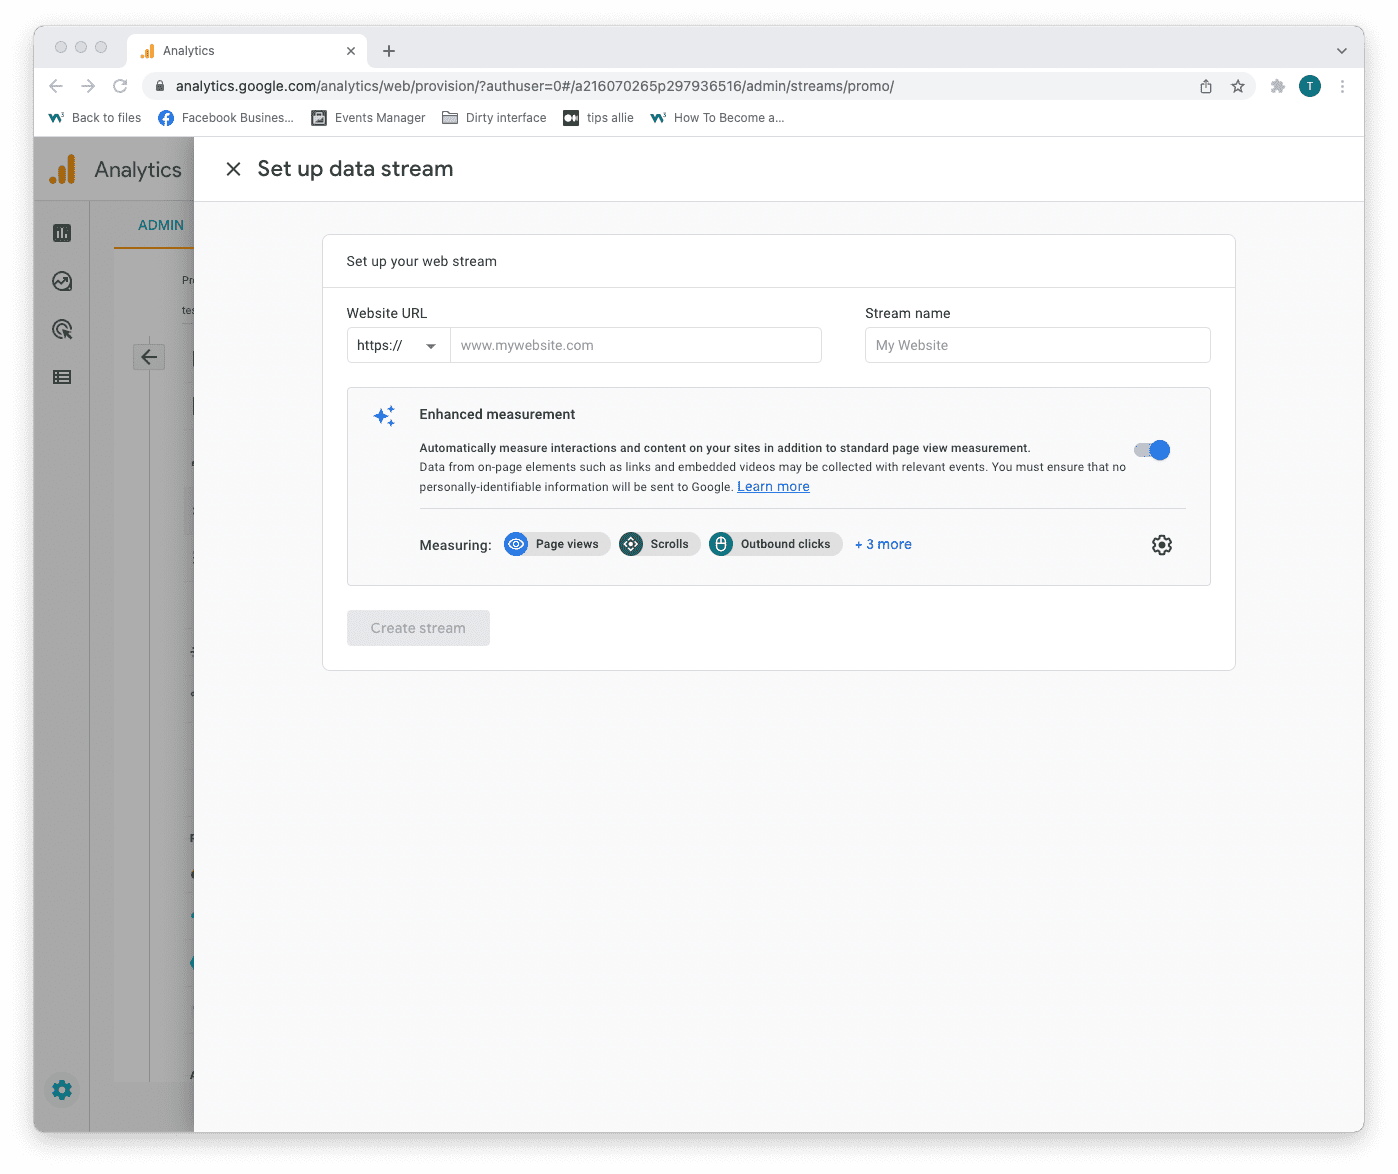
Step 9: Data stream setup
Enter data stream details.
- The URL to your site.
- The name that you want to give the stream.
- Decide if you are to enable enhanced measurement or not.
- Click on the "Create stream" button to continue.
The enhanced measurement can give the data more context. Improving your understanding of the traffic.
Step 10: Web stream overview
Here you can see a detailed overview of the web stream.
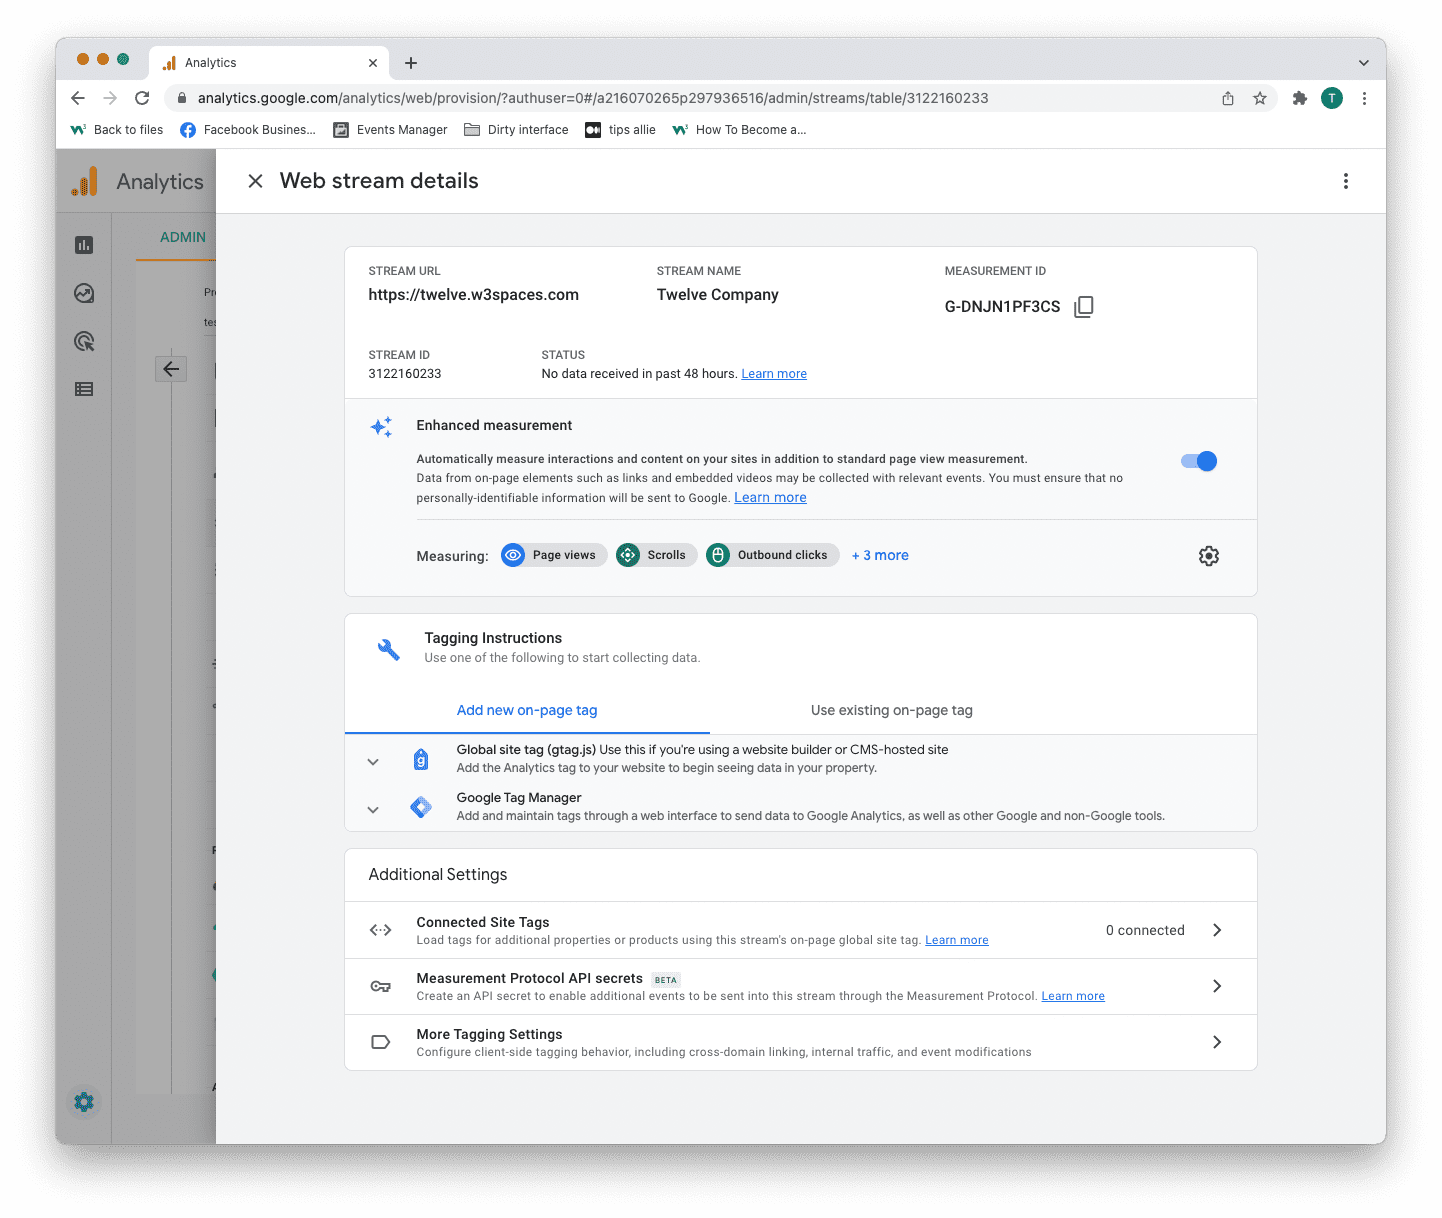
Here are the key takeaways from the overview.
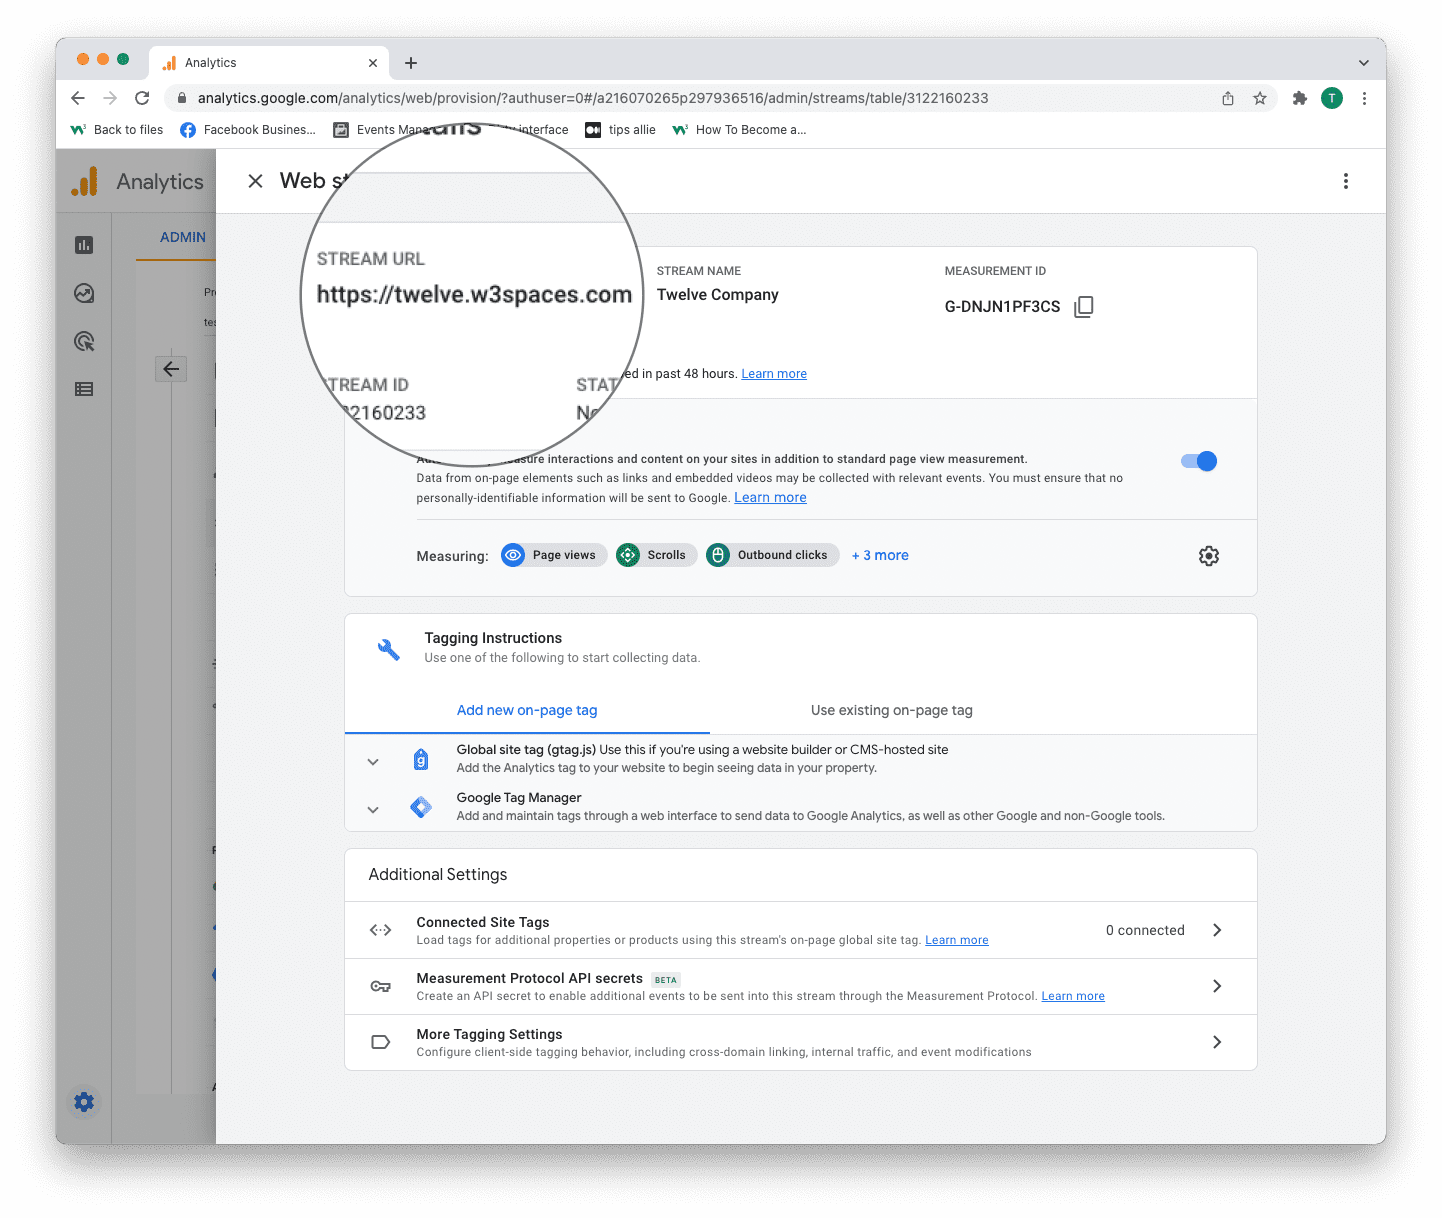
1. Stream URL.
The Stream URL is the link to the connected site.
2. Measurement ID
The Measurement ID is the identifier for your data stream.
It has a format of G-XXXXXXX.
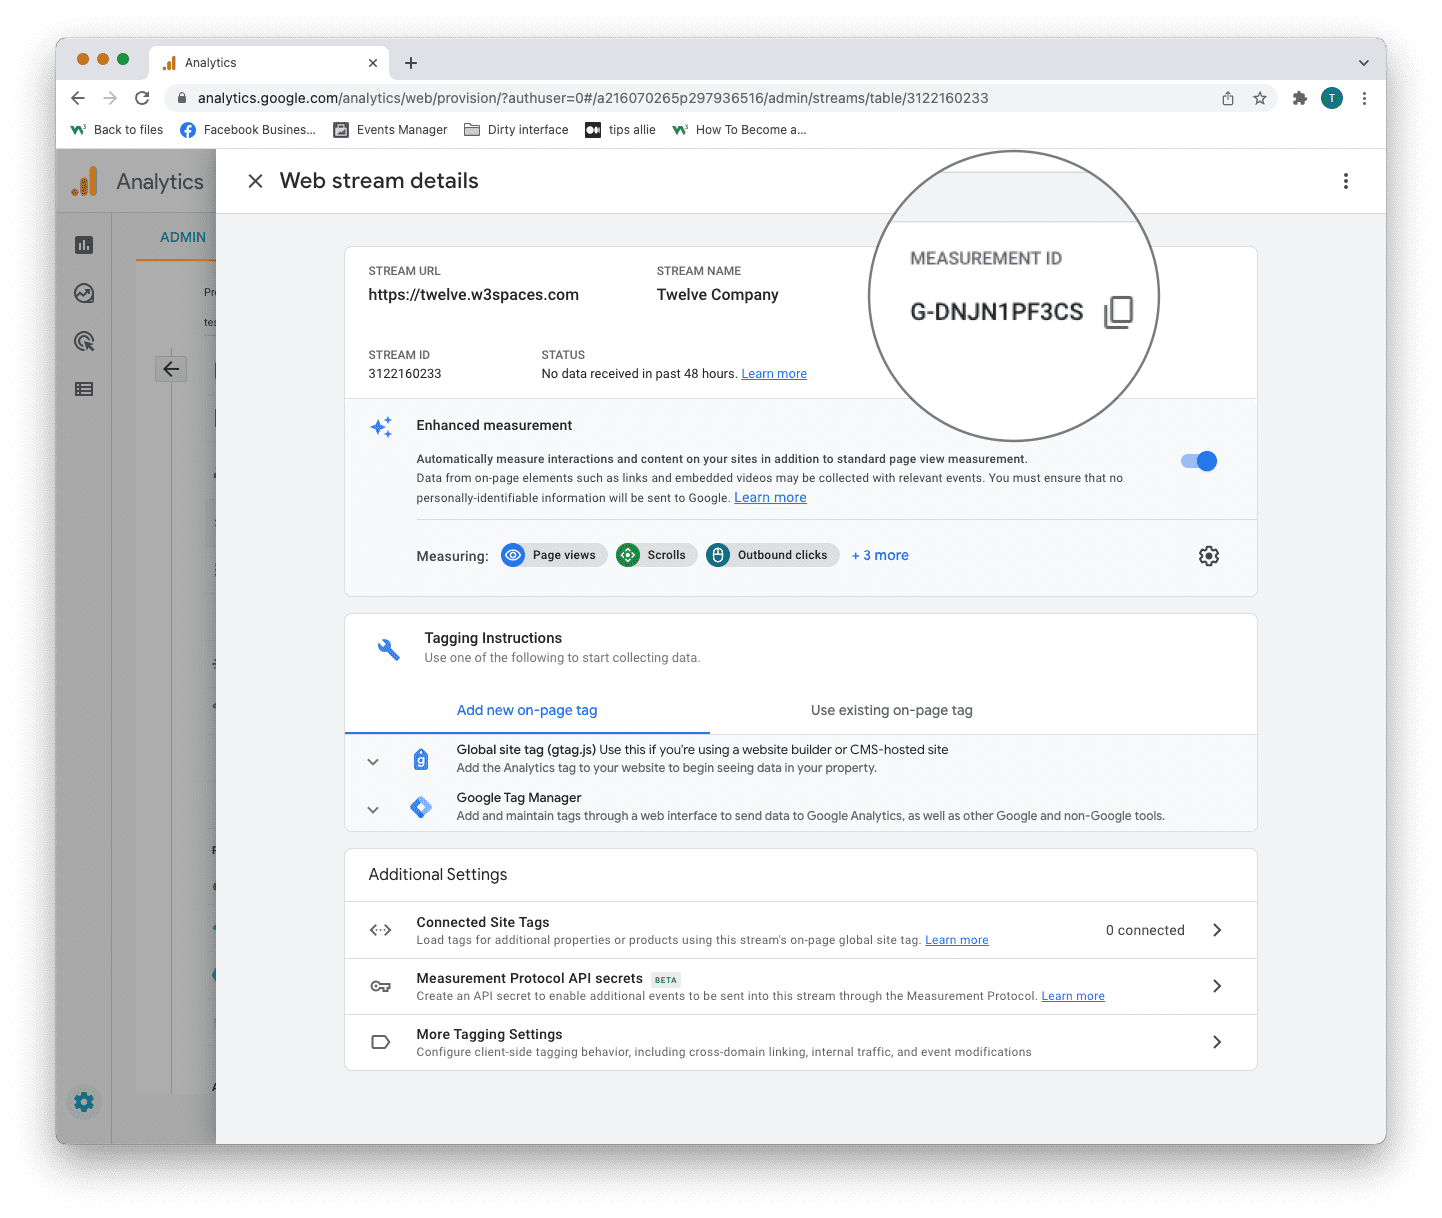
Google Analytics 4 uses Measurement ID. Older versions use Tracking ID. You can not have both.
3. Tagging instructions
Decide to use Global site tag (gtag.js) or Tag manager.
This tutorial will use the Global site tag.
Installing the Global site tag is the easiest and quickest way of getting it up and running.
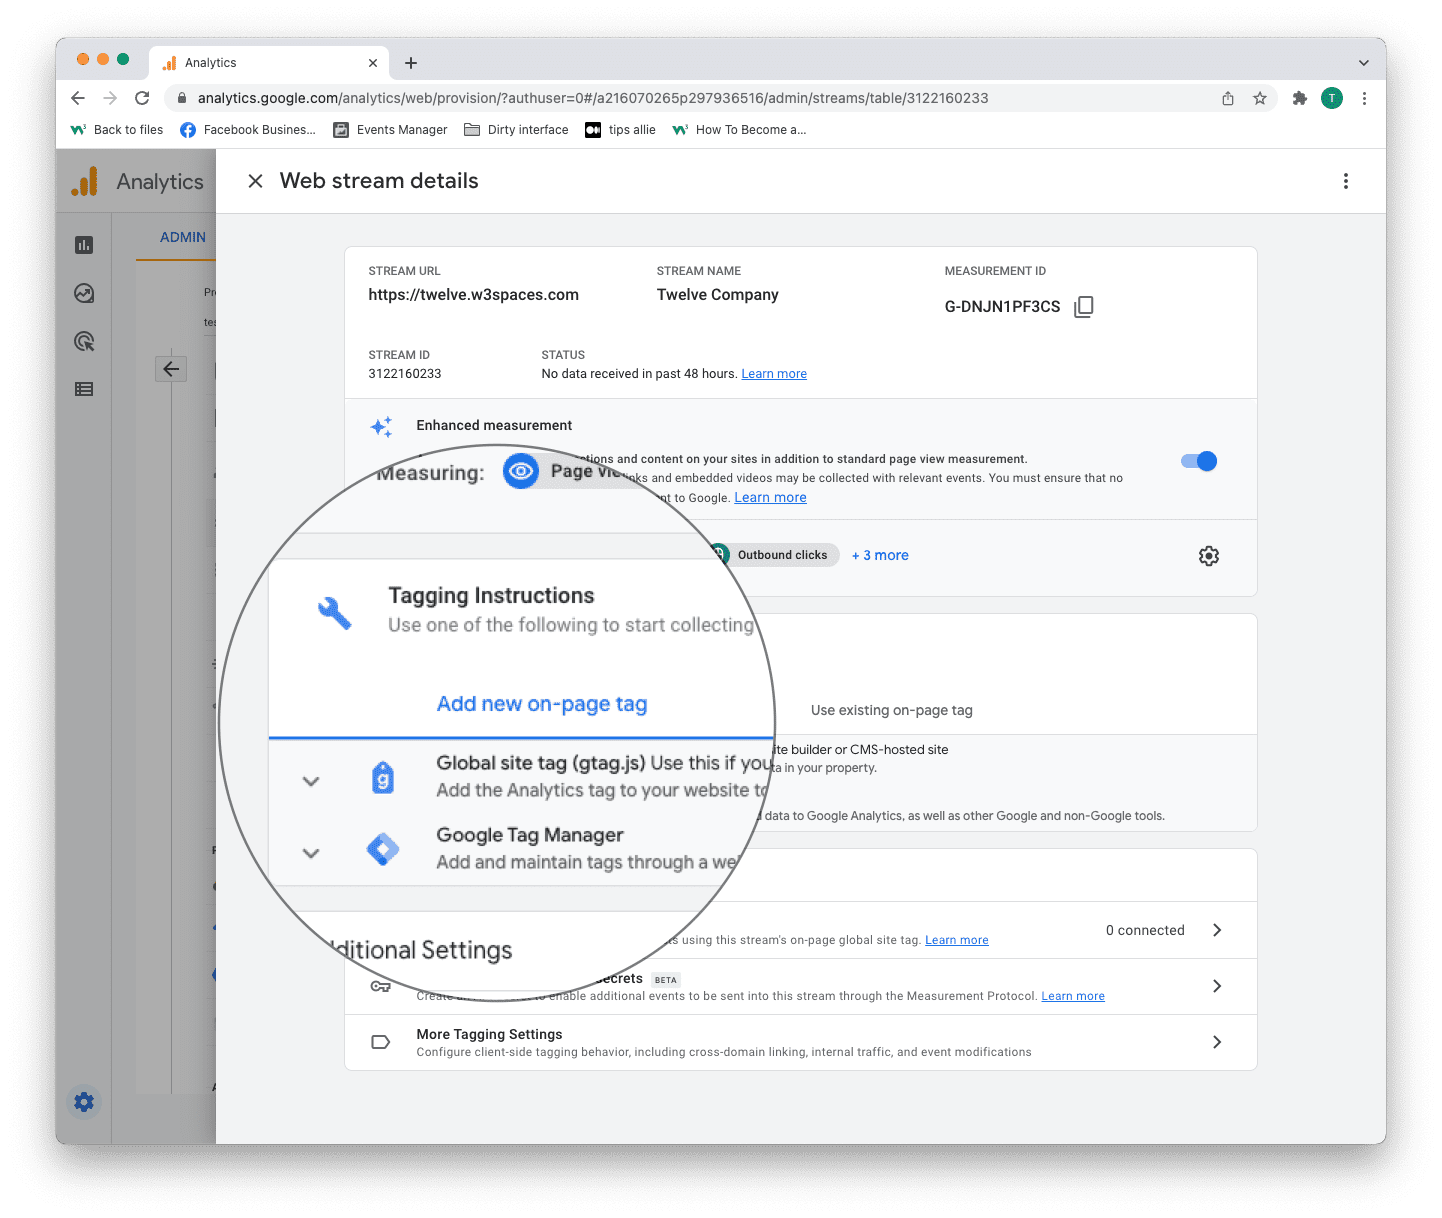
Step 11: Global site tag (gtag.js)
Click the "Global site tag (gtag.js)" row.
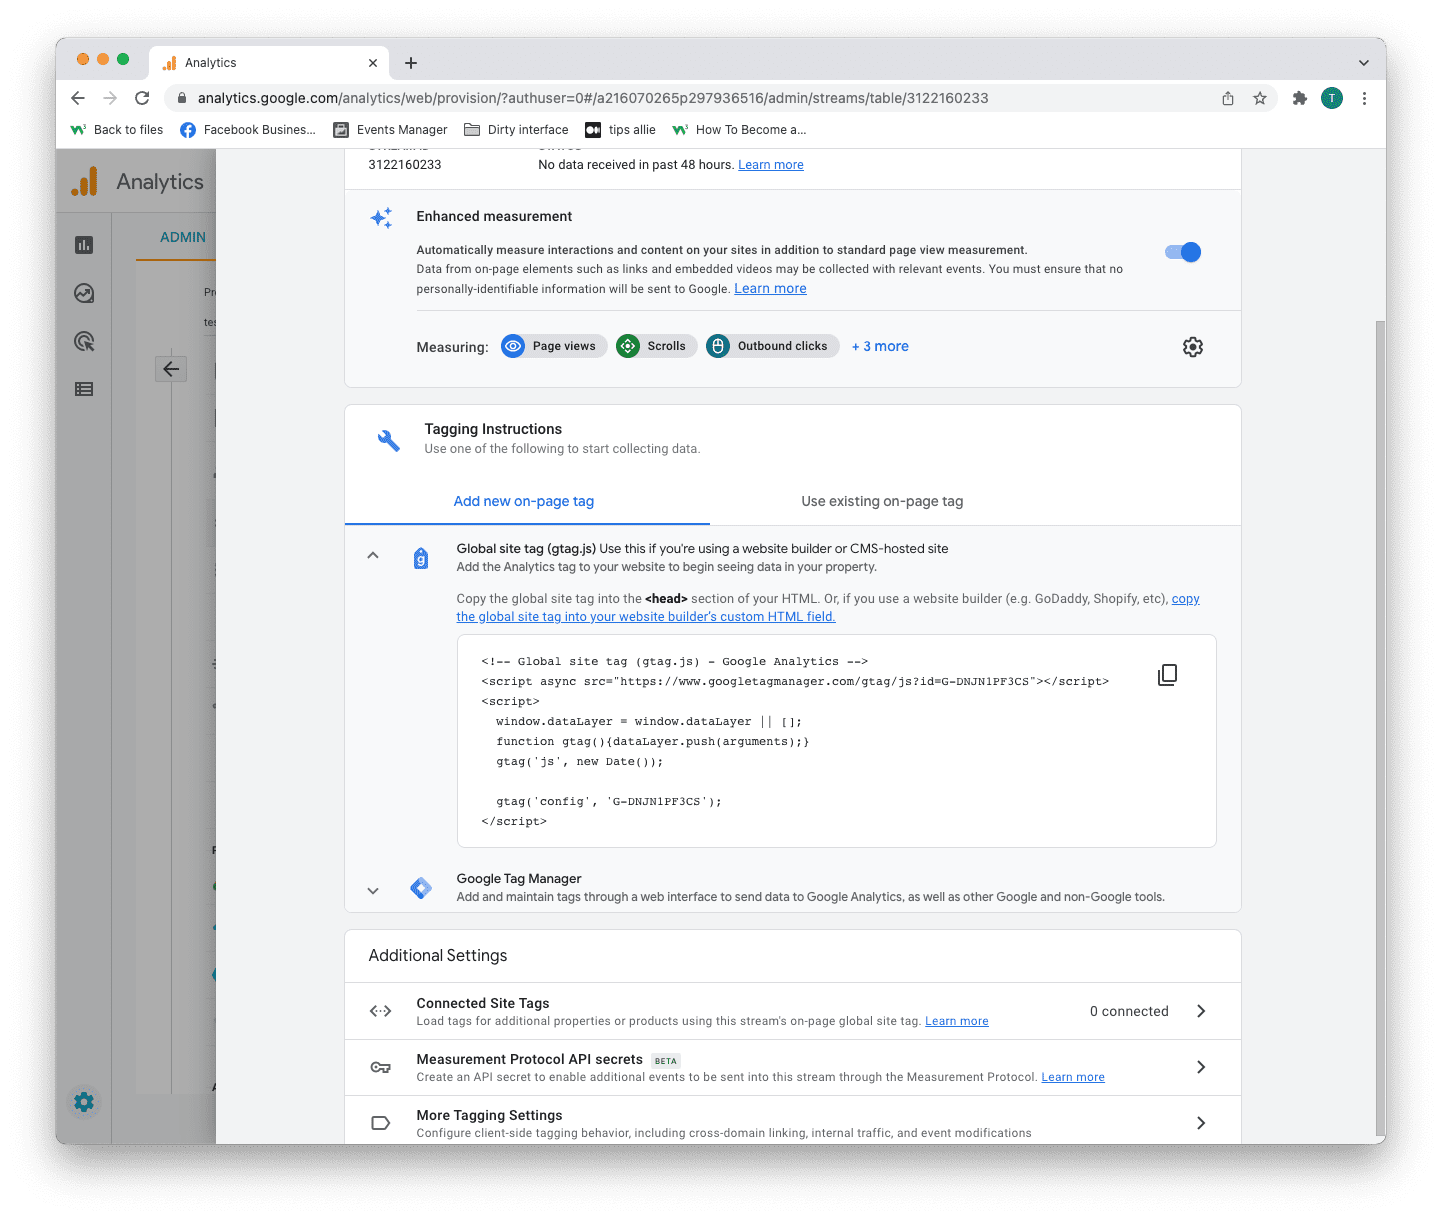
Here you can see a code snippet.
The code snippet is a script to allow Google to measure data on your site.
You can see the Measurement ID in the second last line in the code snippet.
The code snippet
<!-- Global site tag (gtag.js) - Google Analytics -->
<script async src="https://www.googletagmanager.com/gtag/js?id=G-DNJN1PF3CS"></script>
<script>
window.dataLayer = window.dataLayer || [];
function gtag(){dataLayer.push(arguments);}
gtag('js', new Date());
gtag('config', 'G-XXXXXXX');
</script>
Step 12: Enter the code snippet
Copy the code snippet.
Make sure to include your Measurement ID.
Locate the <head> tag in your HTML.
Paste the code snippet just below the <head> tag.
Save and publish the code.
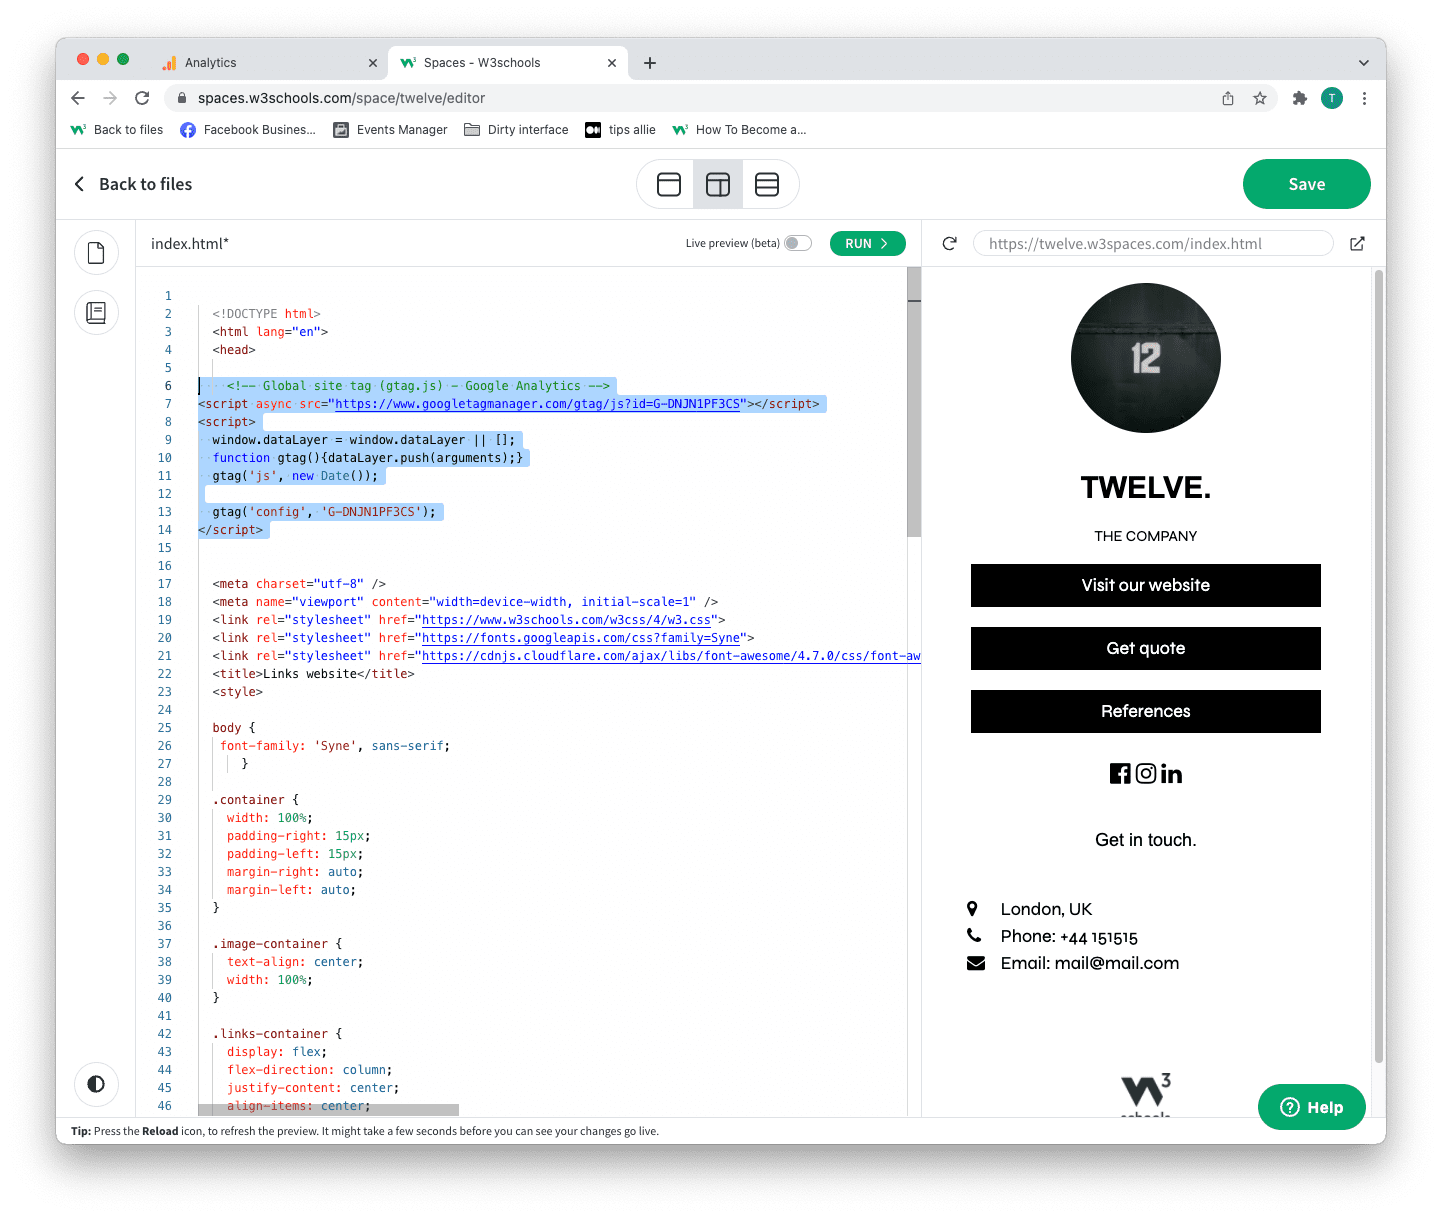
We used W3Schools Spaces in this example.
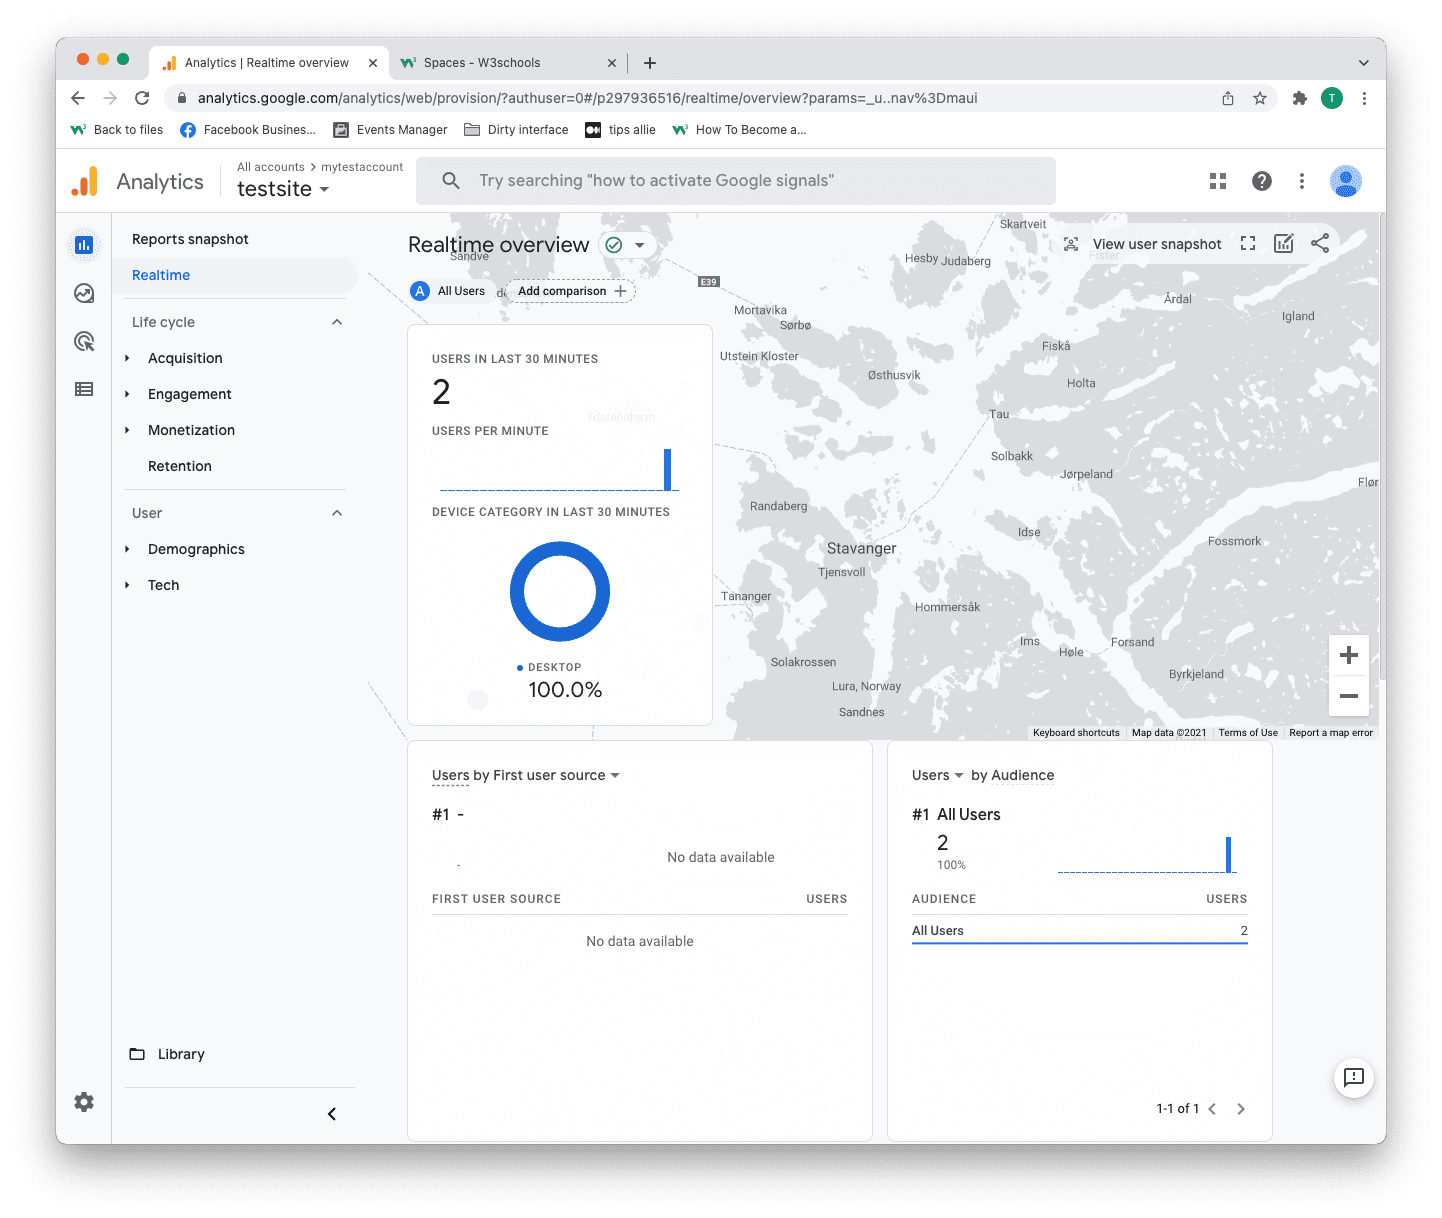
Step 13: Test that it works
Ensure that you have successfully saved and published the code snippet with the correct Measurement ID.
Open the URL for the site you have connected to the data stream.
Click on "Real time" on the menu to the left.
Confirm that you see yourself as an active user.
Congrats. You have successfully enabled Google Analytics for your site!
Explore Google Analytics
Recommended related topics are Tag manager and Events
Spend time in the service to learn about your user activity, commerce, demographics, device, and referrals.
Tip: Ever heard of W3Schools Spaces? It is a personal space where you can make a website from scratch or use a template and host it for free.
It has everything you need in the browser.
Get started in a few clicks.
Start now for free ❯* no credit card required